Compose your header by combining several images – Photoshop

Not all of us are happy with the image that blogger gives for the header.. sometimes it doesn’t fit well with the concept of the blog…. and searching the internet for a relevant picture that conveys the idea behind your blog(Title) is time consuming and cannot guarantee success.

You may have a certain collection of pictures… when put together might give a boost to the appearance of your blog… but don’t know how to go about it… Never mind.. just read the instructions and you will have your own custom header… Checkout the Header here

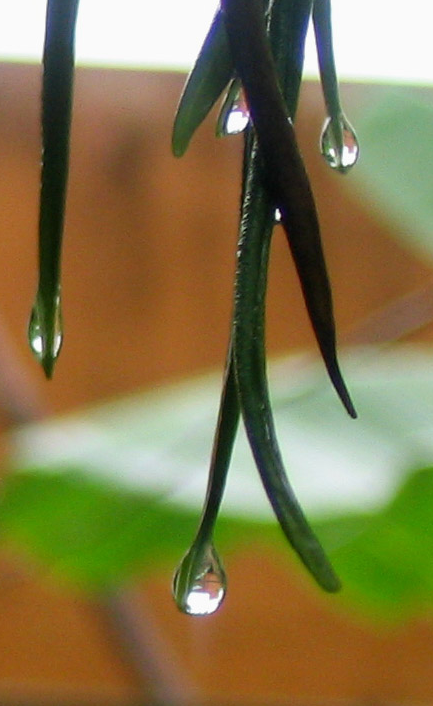
Just for starters.. I have two images here.
JUST 4 PICS PUT TOGATHER…. NO SPECIAL EFFECTS-

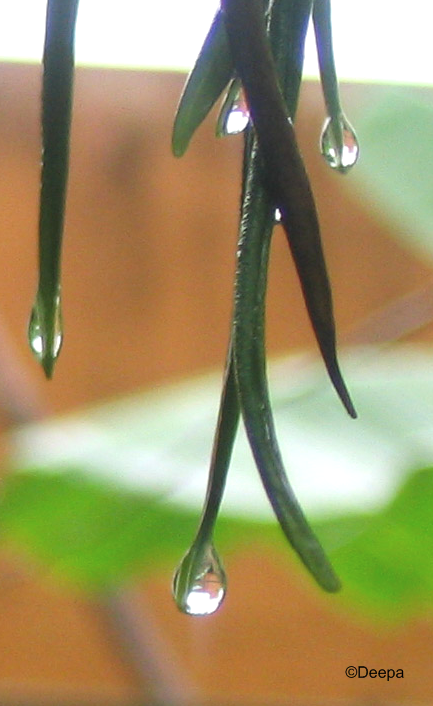
Here…I HAVE MERGED THEM TO GIVE A SINGLE-PIC-LOOK

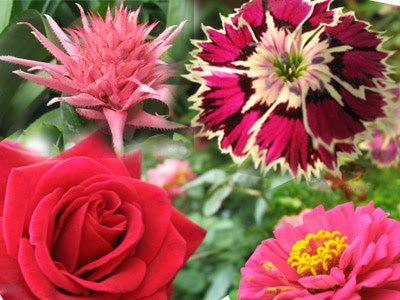
The idea is to combine the 4 pictures and create a new one that appears to be a single picture…. I have used 20 images to create a custom header for My Photoblog.. check it out

I have used Photoshop to achieve this effect.. Few important guidelines before going about creating your custom collage
PHASE-1

  1. Decide on the dimensions of the final picture you want (normal header is 980 x 200)
  2. Create copies of the pictures u want to collaborate ( this way you always have the originals to fall back on incase your attempts go hay-wire)
  3. Get used to working with the TRANSFORM OPTION…….
    • Resize the picture window.. so that you can clearly see all 4 corners ( by clicking and dragging the right corner of the picture window)
    • Select the entire picture — Ctrl + A
    • EDIT-FREE TRANSFORM (or)—-Ctrl +T
    • Notice the change in the cursor when you position it over  the anchor points (change to double headed arrows) at the corners and in the Left &Right sides (and) at the Top & bottom
      • Click and drag the points in the sides.. .. this will alter the width of the picture
      • Click and drag the points at the top / bottom .. .. this will alter the height of the picture
      • Click and drag the point at the corner.... will alter the width & height at the same time
      • Click and drag the point at the corner while keeping the SHIFT key pressed…. will alter the width & height  and also maintain the ratio between the height and width
    • Notice the cursor change to circular shaped arrow when positioned at a certain angle in the corner
      • Click and move the mouse…. this will turn the picture at an angle
    • Hit ENTER once you have decided to apply the changes
    • IF you donot wish to apply changes.. click on any tool… and a message-box will  pop up asking if you would like to apply the changes.. just say DONOT APPLY
  4. Some information about Layer Mask  ( IMPORTANT.. WE WILL BE USING A LOT OF THIS HERE)
    • As the name suggests… it links to the layer which holds your picture
    •  WHILE DRAWING ON THIS LAYER… those areas are rendered invisible in the picture ( I WILL TELL YOU HOW).. this is called masking selective areas in the picture
    • In case you have masked the wrong area.. and want to undo.. use CTRL+Z
    • Even after undoing.. you are not happy… no need to panic and delete the entire file
    • Just right click on the link symbol  that appears between the image and the mask   
      … and give DELETE LAYER MASK
    • Your picture is again back in its original state
    • You may add a new Layer Mask and continue with masking the way you want it to be
  5. Start with a 400×300 image that holds 2 images….. just to get acquainted with the whole process of the before and after appearance … before trying the 980×200 image for header

PHASE 2—–INSTRUCTIONS TO CREATE YOUR COMPOSITE HEADER

  1. Open Photoshop and create a new file giving the dimentions …. Lets name it Collage.psd
  2. Have a Transparent Background
  3. Open the all the images that you want to combine…( ALWAYS SAVE YOUR ORIGINAL IMAGES AND … USE ONLY THE COPIES HERE)
  4. We are going to resize & transform the images so that they fit into the New file.. ie Collage.psd
    1. Select IMAGE-1 and use the TRANSFORM TOOL  to resize and rotate ………….. PHASE1–STEP3
    2. Apply changes by hitting ENTER
    3. You will notice that the resized picture is already selected …(take care not to click anywhere at this point)
    4. Copy using Ctrl+C  ( or Edit- Copy)
  5. Click on the New file …Collage.psd
    1. Paste using Ctrl+V ( or Edit-paste)
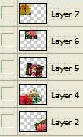
    2. You will notice that the image is added as a new layer in your layer pallete
    3. If the resized image is too large / small… donot worry.. just click CTRL+T to transform the image
    4. Increase / Decrease the size… or rotate the picture… and hit ENTER when you are satisfied
    5. Use the Move Tool to move the IMAGE-1 at a position you feel best
  • Follow STEPS 4 & STEP 5 till you have all the images positioned neatly and arranged according to you wish
  • Save the Collage.psd frequently so that you donot loose any changes… Once you are satisfied with the manner of arrangement of the pics… you may close the individual pictues
  • You may notice that they overlap with once another… and certain pics are displayed only half… here is where the magic of Layer-Mask starts
  • Its advisable to start from the topmost layer and then work towards the layers positioned at the bottom
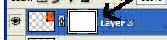
    1. Select the layer whose areas you want to render invisible… and look here at the bottom of the layer pallete
    2. Click on in the layer palette to add the layer mask
    3. You will notice that the image layer has changed to this
    4. Notice the double outline around the Mask-Layer… this means that the "Layer Mask in selected"
    5. Always make sure that the Layer Mask is selected when you begin the Masking process
  • The Process of Masking the areas in the image which you donot want to be seen
    1. Make sure that the MASK LAYER IS SELECTED
    2. Click on the Brush-Tool … if you see a pencil the
      n click and hold the mouse button down a little longer… you will see the brush… then click it
    3. In the Brush Tool bar ( Seen at the top… just below the Menus)… … click on the down arrow to adjust the diameter of the brush…ie… make the brush large / small
    4. Similarly adjust the strength / hardness also
    5. Select the various styles of hardness from the list given
    6. Make sure that the foreground color is black
    7. Once again make sure that the MASK LAYER IS SELECTED.… the double outline at the mask layer
    8. Now just click on the image.. at the area which you wish to conceal
    9. Notice that the particular area is faded & erased.. revealing the image underneath
    10. Also notice that the Masked-Layer (in the layer palette) will show patches exactly in the same areas where you had concealed.. SAVE collage.psd
    11. Continue procedure…. (h) (i) (j) till you have masked ( hidden) the relevant parts of the image
    12. Once you are satisfied with the appearance of this layer… choose another image ( which is in another layer) and repeat the processes  from STEP-9 ( a,b,c,d,e) STEP -10 (a,b,c,d,e,f,g,h,i,j,k,l)
  • You may notice .. as you slowly start masking the layers.. one by one.. all the pics merge into on another to create a single-picture-look… Save your Collage.psd
  • Now save this image as a jpeg by FILE – SAVE AS – choose JPEG from the dropdown box.. and give a name
  • VOILA !!!… your own custom collage is now ready for upload to be displayed
  • Hope I have included every conceivable obstacle that you might face… incase I have missed out any do let me know by dropping a word at the comment section.. Once you get the feel of working with Layer Masks… there is no stopping at the effects you can achieve in matter of minutes. I insist that you experiment with the procedure listed above by choosing 2 pictures and merging them as one… by using layer masks…

    Once your Eyes & hands work in synchronization … then you can go about merging ‘n’ number of pictures to give yourself a customized image that can be used in the header – background .. or just plain composite image .

    If this post has been helpful to you.. do drop a word of appreciation. Your appreciation is my motivation

    Paint.net – Free Image editing tool for those who cannot afford Photoshop

    Photoshop is THE TOOL for image editing… and there can be no second opinion about it..( Ask some die-hard Photoshop fan.. we can come up with umpteen reasons.)..However.. not all can afford to get a copy of Photoshop and the trial versions don’t last more than 30 days & they don’t include all the features that are otherwise available in the complete versionFor those who cannot afford Photoshop… help is near.

    With the .Net technology gaining pace.. can MSPaint be far behind. We have a newer version of Paint called the Paint.net. This is a freeebee so anyone can download it for free (just a click away..and only 1.4MB).. and you get the full version ( so no alert messages telling that the trial period is going to expire soon.). What makes this a great alternative tool for image editing is… its interface is very user friendly…It has all the tools and MSPaint and most of the tools of Photoshop.Moreover they have a Forum to help newbies and a Wonderful Blog telling about the recent updates-features-and many more

    About Paint.NET
    Paint.NET is free image and photo editing software for computers that run Windows. It features an intuitive and innovative user interface with support for layers, unlimited undo, special effects, and a wide variety of useful and powerful tools. An active and growing online community provides friendly help, tutorials, and plugins

    1. Every change you make can be performed in layers.. so that .. incase you are not happy with the change… you can delete the layer .. while retaining other changes made
    2. You can add new layers to brighten your otherwise dark picture ( incase you forgot to turn the flash on)
    3. You can correct the Red-eye.. ( so nomore last minute fiddling to enable red eye in camera)
    4. You can add your own signature Text .. like © Deepa…adding your own copyright..(coool isnt it??)
    5. Supports all major picture formats ( except for Animated Gif files)

    And many many more option… Explore and you will not be dissappointed… The posiblities are immense.. after this.. its your imaginatrion and Paint.net.. They also have a Forum to address user Queries.. So any query.. however trivial.. there is always someone to guide you.

    Here I will just give a small intro on how to add your copywright mark to the pic

    Copyright is something like “© Deepa” which I put in the pictures that I upload to the net.. which means that this pic is entirely mine .To do this is Photoshop.. we need to use the “custom shape tool”… however in Paint.net.. this is the procedure to add © to the pics

    Remember always create a copy of the original picture to work on.. Try not to make any changes .. however slight to the the original.. You may end up loosing a perfectly good picture.. incase the alterations does not come out right

    1. Open the picture to which you want to add your ©  mark
    2. © is a special character.. so you will have to open the "Character Map"
    3. START-RUN -Charmap.exe  .. or Start-Programs-Accesories-SystemTools-Character Map
    4. Locate the ©  as shown here
    5. Either double click the ©  symbol.. or clcik the select button ( or make a not of the "KEYSTROKE combination as shown in the pic"
    6. cick the Copy button
    7. Open the Paint.net window( where you have the pic already opened) and select the Text Tool

    1. Click at the position where you want the copyright stamp to appear.. ( Its wise to have this stamp at any of the corneres.. so that people can admire the picture withought gettng distracted by the stamp)… Dont worry if the position didnot match exactly with what you had in mind…. There is something called as "moving the text"
    2. Once the Cursor blinks.. just paste using Ctrl+V ( or Edit Paste.. or use the KEYSTROKE COMBINATION ).. you will see the ©  appear.. following which you can type your name / time stamp of the photo.. etc etc

    1. You many also choose the font size / style and color
    2. Inorder to move the "TEXT" that you have just now added… just click and drag the Square like thinggy to the postion that you might feel appropriate
    3. Save the Picture as Jpeg once you are satisfied with the changes…

    Do drop in with a word if this post has been useful to you.. also..please express your appreciation by linking back to this post.. after allYour appreciation is my motivation

    Create your own Animated pictures

    Sometimes we would like to create our own animated gif files..It could be either using 2 ( or more) picturtes available with us ( say some of own digital photos) or comming up with your own creation of an animated picture

    Here I have use 2 existing jpeg files and put them in a loop so that both the pics appear on and off
    Here I have
    used a collection of pictures to create the effect of opening and closing of a Star as a single animated gif file….I found geometric designs to be easy for learning puropse…and i have used 6 bmps here

    In order to be able to do this.. you need to have Photoshop / Image-Ready already installed .. you must be willing to give yourself some time to learn about the workspace get used to the environment…Follow the instructions carefully

    1.THE PREPERATION

    1. If you are going to create your animation form your existing collection of jpegs.. then I suggest taht you copy them and place them in an exclusive folder in your hard disk..say C:\Testing_animation
    2. Say you are using Pic1.jpeg & pic 2.jpeg
    3. It is adviable if the pictures have same width and/ or height for best visuals
    4. I have used Photoshop CS2 to create the animation..But the instructions would be similar for pre-CS2 versions also….(if the Animation option is avilable)

    The Star.gif uses 6 bmp files each with the same 100×100 dimentions

    2.PHTOSHOP CS2

    By now I hope you would have decided on the dimentions of your gif file and chosen the pics accordingly

    1. Open both Pic1.jpeg & Pic2.jpeg in Photoshop
    2. Create a New Photoshop file from FILE — NEW — Sepcify the width and height
    3. Before we actually begin our animation lesson.. Lets see the order of the pictures

      Pic_1 — Pic_2 –Pic1

      Here we will be putting pictures in photoshop in this order using layers

    4. Keep the Layers pallete visible…WINDOW — LAYERS

    All New files will have a default layer which serves as the background

    1. Add Pic_1 to layer1
    2. Add New Layer — Add Pic 2 (Layer 2)
    3. Add New Layer — Add Pic 1 (Layer3)…this is to give an impression of loop
    4. You may name the layers appropriately
    5. Donot worry over what you may see on the image canvas at this point of time
    6. I have given the layer palette of my star.gif where I have used bmp’s
    7. The layers are named for quick refrence
    8. Save this file in psd format … so that you may reuse for editing in photoshop againAlso save a backup copy ( psd format) at this point on
    9. Make sure that the pictures are well arranged in the layers .. in exactly the same order as you want them to be displayed in the gif file
    10. You may rearrange the layers by click-and-drag methord

    3.THE ANIMATION PROCESS

    1. Now you must have your pictures in the desired sequential manner in the respective layers
    2. Make sure only the first layer (first pic to be displayed) has its EYE TURNED ON… Rest all the layers must have its “eye-turned-off”
    3. You may see in my layer pic that only the ist layer has the “Eye” icon.. all the other lauers donot-have-eye-icon
    4. This can be done by selecting the respective layer and clicking on the “Eye”
    5. Enable the animation pallete WINDOW — ANIMATION
    6. Since all the required pictures are arranged in layers…we need not worry about adding indivivual frames and modifying them
    7. We can convert all the layers into frames using the option given in the animation palette
    8. SEE PICTURE
    9. this will convert all your layers into frames
    10. The technical-know-how is…..Cick on each frame and see that only its corresponding layer will have the EYE-TURNED-ON…..Rest all layers will have its eye-turned-off
    11. You may set the time for each frame..at the location specified in the pic
    12. Use the Play-buttond to see the animation. (inside photoshop)
    13. Once fully satisfied you may use the FILE — SAVE FOR WEB — GIF FILE
    14. Now you have a Gif file in the folder..view the gif file in IE
    15. You may now upload this gif file and display it using <img src= ” ___ “/>

    IF this post has been helpful to you..kindly leave a comment and express your appreciation by linking back to this post.
    Your appreciation is my motivation